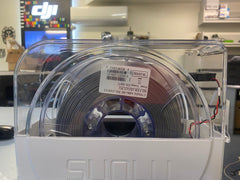
We've been testing the Sunlu Filament Drier for a couple of weeks now and we noticed that by simply adding a small fan to circulate air within the box, the performance was much better:
We call this the Sunlu Filament Dryer Fan Mod!
Please note that by doing this upgrade soldering modification is required and any mistake / shorting by soldering to wrong areas or solder blobs will not be covered by warranty.
Before Fan
- Top of filament area maxed at 35 degrees
- Top of filament area maxed at 30% humidity
- Heat only remains around heating element in bottom chamber of box.
After fan
- Top of filament area got to 45 degrees
- Top of filament area maxed at 15% humidity
- Heat distributed all over box
This guide will hopefully help you through the steps to adding a small fan to your enclosure.
You will need:
- 24V Fan (We recommend 30x30 size) [This E3D Fan works well]
- Philipshead Screwdriver
- Flatheat Screwdriver
- Guitar Pick (or something similar)
- Soldering Iron
The first step is to remove the 4 screws holding the metal heater down with a philips head screwdriver.

Once these are removed, you'll need to push the sides of the drier out a bit to remove the two rods holding the spool above the heater. These are a bit tight but the foam will move out of the way once started.
Don't pull the metal heater up yet! It still has wires attached that we will un-plug now. Gentely pull back the heater to expose a small section of the LCD screen. Using a flathead screw driver, push down on the black clip to release the top of the LCD screen cover.

This next bit is the hardest part out of all of it. Flip the drier upside down and carefully, using a guitar pick or something similar, try to push down on the bottom two clips holding the LCD cover in. You can do one at a time so don't worry about trying to do both at once.

Once this is gone, you'll see an LCD screen with multiple wires coming from it. Remove the four philips head screws and unplug both the small and large red connectors. You can now gently pull out the metal heater.


We're then going to solder the positive and negative wires of the fan to the 24V input on the barrel jack. The negative wire goes to the top pad whilst the positive wire goes to the pad on the side, where the red wire is.

Attach the fan to the lid with doublesided tap or hotglue. Make sure it clears normal rolls of filament and isn't straining the wires when the lid is open.


For the best performance, make sure the fan is forcing air down into the heater.

Put the metal heater back in and feed the wires back through the hole and re-connect them into the LCD. Screw the LCD back in and re-attach the LCD cover. Screw the heater plate back on and squeeze the rollers back into place. Plug the power supply back in and you're good to go!